
Creating a worm box for composting is an eco-friendly solution that not only helps manage kitchen waste but also enriches your garden soil. By learning how to make a worm box for composting, you can reduce landfill waste and produce nutrient-rich compost. This guide will walk you through every step of the process, from choosing the right materials to understanding how to maintain your worm box effectively. Whether you’re a novice gardener or an experienced composting enthusiast, this comprehensive guide will provide valuable insights into fostering a thriving compost ecosystem in your backyard.
Understanding the Basics of Vermicomposting
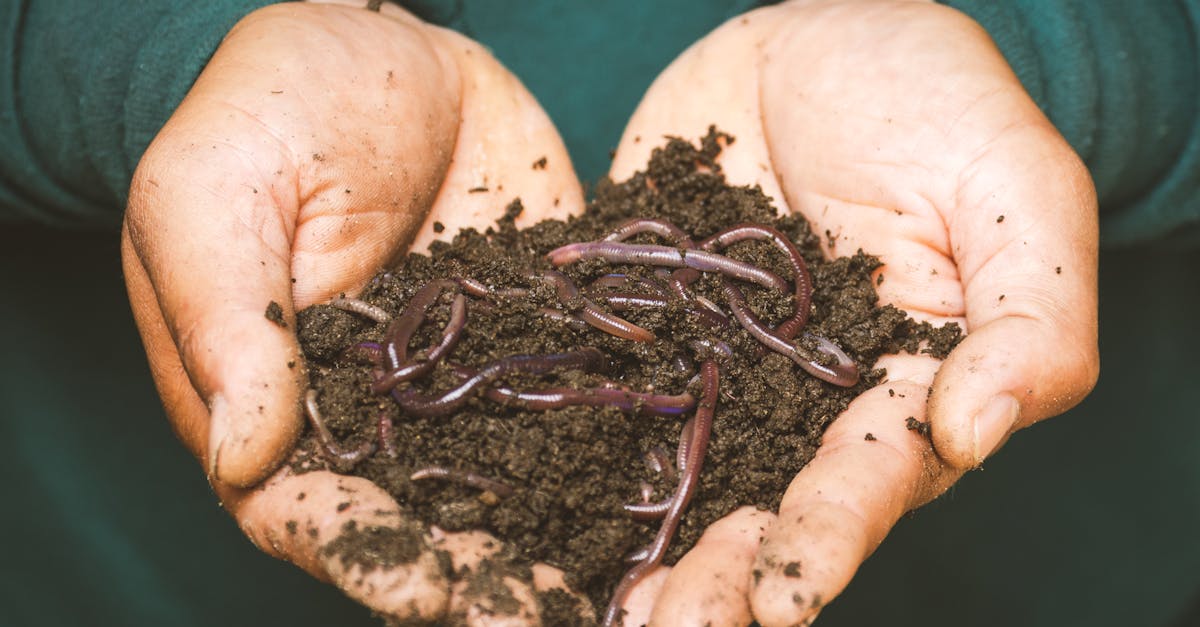
Vermicomposting is a simple, sustainable method that transforms kitchen waste into nutrient-rich compost using worms. This eco-friendly process not only reduces landfill waste but also benefits your garden. By understanding how to make a worm box for composting, you create a habitat for beneficial worms, which efficiently break down organic matter. Red wigglers are an ideal species for this task as they thrive in decaying material and are highly effective at composting. Begin by choosing a suitable box, ensuring adequate drainage and ventilation for optimum worm health. Establishing this method can significantly enhance soil fertility, support plant growth, and contribute to a healthier environment. Start your journey toward a greener lifestyle by creating your worm box today!

Choosing the Right Container for Your Worm Box
Selecting the appropriate container is a pivotal step in effective worm composting. A well-suited worm box should provide proper ventilation and drainage, ensuring a healthy environment for your composting worms. Most suitable containers include wooden bins, plastic storage boxes, or specially designed worm bins available online. Ideal dimensions typically measure 1-2 feet in depth and 2-3 feet in length, allowing ample space for worms to thrive. Consider using a lid to regulate moisture and maintain temperature—an optimal range is between 55°F and 77°F. By prioritizing these aspects, you’re setting the stage for successful composting. If you’re eager to dive into this rewarding endeavor, learn how to make a worm box for composting today!

Essential Materials Needed for Constructing Your Worm Box
Creating a successful worm composting system begins with the right materials. To build your worm box, gather a sturdy, wooden or plastic container, ideally with a lid. Drill several ventilation holes for airflow, ensuring worms have a breathable environment. Inside, include bedding materials like shredded newspaper or cardboard, which provide comfort for worms while retaining moisture. Add a drainage system to prevent excess liquid accumulation, promoting healthy composting. Lastly, stock your box with red wigglers, the most efficient composting worms. With these essential components, you’re well on your way to mastering how to make a worm box for composting, turning kitchen scraps into nutrient-rich soil.

Setting Up Your Worm Box: Step-by-Step Instructions
Setting up a worm box for composting can transform your kitchen scraps into nutrient-rich fertilizer. First, select a bin—rubbermaid containers or wooden boxes work well. Ensure it has proper ventilation by drilling holes in the lid and sides, as worms need air. Next, add bedding materials like shredded newspaper, cardboard, or coconut coir to create a comfortable environment for your worms. After moistening the bedding slightly, introduce your worms, ensuring they’re evenly spread. Feed them kitchen scraps, avoiding citrus and onion, to keep them happy. Remember to monitor moisture and airflow regularly. With these steps, learn how to make a worm box for composting efficiently and enjoy the benefits in your garden!

Caring for Your Worms: Maintenance and Feeding Tips
To ensure your composting worms thrive, regular maintenance and proper feeding are crucial. Start by creating a balanced diet consisting of kitchen scraps like vegetable peels, coffee grounds, and crushed eggshells. Avoid citrus and oily foods to keep them happy! Monitoring the moisture level in the worm box is essential; it should feel like a damp sponge, not soggy or dry. Every few months, check the bedding material and replenish with shredded newspaper or cardboard as needed. Additionally, provide aeration to prevent odors by gently mixing the bedding. Engaging with your worms not only enhances compost quality but also ensures your gardening efforts yield rich and fertile soil. Begin your journey by learning how to make a worm box for composting today!

Troubleshooting Common Problems in Worm Composting
When embarking on worm composting, you might encounter various challenges that can hinder your success. Common issues include odor problems, which are often a result of overfeeding or inadequate ventilation. If your worm bin smells, cutting back on food and adding more carbon-rich materials like shredded paper can help alleviate this. Another frequent problem is pests such as fruit flies, which can be managed by ensuring the bin is not overly moist and covering food scraps with browns. Monitoring your worms’ health is also crucial; if they are sluggish or dying, it may indicate unsuitable bin conditions. Keeping a balanced diet for your worms and adjusting moisture levels can significantly enhance your composting results. Begin troubleshooting these concerns promptly for a thriving worm composting setup.
Harvesting and Using Your Worm Compost
Harvesting worm compost, or vermicompost, is vital for maximizing your gardening efforts. After about 3-6 months of composting, you can begin collecting the nutrient-rich castings your worms produce. Start by gently moving the compost to one side of the bin, encouraging the worms to migrate to the other side. This way, you can access the finished compost with minimal disturbance to the worms. The castings can enrich your garden soil, enhance plant growth, and improve water retention. To use, simply mix the vermicompost with potting soil or sprinkle it directly onto your garden beds. This natural fertilizer is packed with beneficial microorganisms and nutrients. Begin reaping the rewards of your worm box today and watch your plants thrive!

Conclusion
In conclusion, mastering how to make a worm box for composting is a rewarding endeavor that not only benefits your garden but also contributes to a sustainable environment. With this guide, you are well-equipped to set up and maintain a worm composting system that can transform your organic waste into valuable compost. Embrace this eco-friendly practice and watch your garden thrive!